Hello everybody, hope you are having an incredible day today. Today, I’m gonna show you how to make a special dish, russian piroshki. One of my favorites food recipes. This time, I’m gonna make it a bit unique. This will be really delicious.
Cherry Piroshki Recipe (Russian Pastry Buns) How to Make Traditional Russian Piroshki with Braised Cabbage Filling. I'm Russian, and this recipe has been handed down from my grandma.
Russian Piroshki is one of the most favored of recent trending foods in the world. It is appreciated by millions every day. It’s simple, it is fast, it tastes delicious. They are nice and they look wonderful. Russian Piroshki is something that I’ve loved my entire life.
To begin with this particular recipe, we have to prepare a few components. You can have russian piroshki using 19 ingredients and 15 steps. Here is how you cook that.
The ingredients needed to make Russian Piroshki:
- Prepare For the batter:
- Take 200 grams ☆ All-purpose flour
- Prepare 2 tsp ☆ Baking powder
- Prepare 1 pinch ☆ Salt
- Prepare 20 grams ☆ Sugar
- Prepare 20 ml Vegetable oil
- Prepare 90 ml Milk
- Get For the filling:
- Make ready 1/4 Onions (finely chopped)
- Get 1/4 Carrot (finely chopped)
- Get 1 Green bell peppers (finely chopped)
- Prepare 1 clove Garlic (finely chopped)
- Prepare 10 grams Cellophane noodles
- Take 100 grams Ground pork
- Take 4 slice Sliced cheese (non-melting type)
- Prepare 1 tsp each * Sugar, soy sauce, and chicken soup stock granules
- Prepare 1 tbsp each * Sake, ketchup
- Prepare 1 *Salt and pepper
- Make ready 1 Oil for deep-flying, beaten egg, flour for dusting
Make these on a warm day when you can open your. Traditional Russian Piroshki and how to make it. Russian Piroshki is traditional Russian food and one that I have been introduced to over the years. How to Make Sushi Hamantaschen for Purim.
Steps to make Russian Piroshki:
- To make the dough: Sift the ☆ dough ingredients together. Add the milk and vegetable oil and mix with chopsticks.
- Once the dough starts to come together, form it into a ball and knead it until smooth. Wrap in plastic wrap and let it rest in the refrigerator for 30 minutes to 1 hour.
- To make the filling: Mince the vegetables. Put the harusame noodles and water in a microwave-safe container, and microwave for about 3 minutes. Drain and cut it with scissors into 1.2 cm length.
- In a skillet, heat some oil and sauté the garlic until fragrant. Add the onion and carrot and sauté until tender.
- Once the vegetables are tender, add the green pepper and ground meat and sauté until cooked.
- Add the harusame noodles and the * seasonings to the skillet. Add salt and pepper to taste. Cool and divide the filling into 8 equal sections.
- To wrap the filling: Dust the working surface with flour. Stretch the dough into a long stick shape and divide into 8 equal sections.
- Roll out the dough into a circle and place 1/8 of the filling from Step 6.
- Place 1/2 of a piece of sliced cheese on top and brush the beaten egg around the edges.
- Fold the far side of the dough toward you leaving 1 cm of the edge.
- Roll up the dough from the edges.
- Wrap up the edges making sure that the filling does not spill out.
- Wrap all 8 rolls in the same manner.
- Deep-fry the dough at 160-170℃ until golden brown.
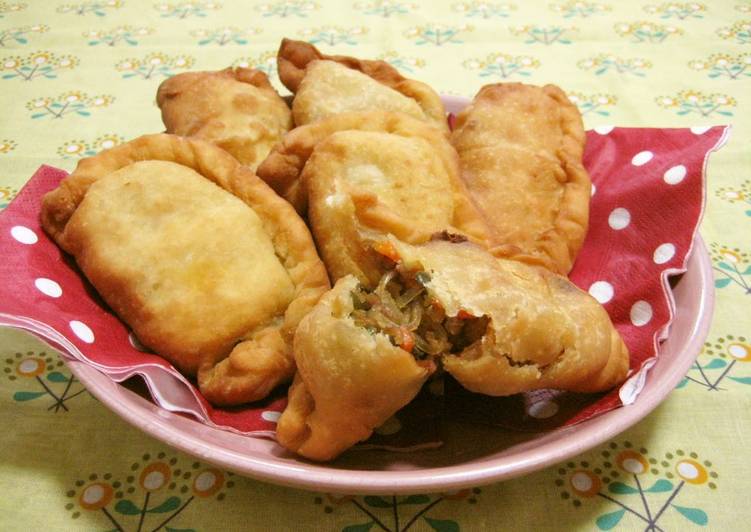
- Put them on a plate and they're ready to serve.
Sign up for our Nosher recipe newsletter! Russian Piroshki with mushroom potato filling-Пирожки. Fried Russian Meat Piroshki Recipe (buns) with a meat filling. Piroshki are yeast dough buns with a filling and are either baked or fried. They can vary in shapes and sizes.
So that’s going to wrap this up for this exceptional food russian piroshki recipe. Thanks so much for your time. I’m confident that you can make this at home. There’s gonna be interesting food at home recipes coming up. Remember to save this page in your browser, and share it to your family, colleague and friends. Thanks again for reading. Go on get cooking!